IL KIT
Il kit Trumpeter 05103 risultA di facile montaggio, i
difetti più grandi sono essenzialmente tre:
1) Grossi
segni di iniettore, per fortuna siti in maggioranza in punti non a vista.
2) Il
canopy con un enorme bava in plastica e un posizionamento in sede non
precisissimo
3) Le
dimensioni ragguardevoli e la forma che rendono difficoltosa ogni operazione,
specialmente la pittura.
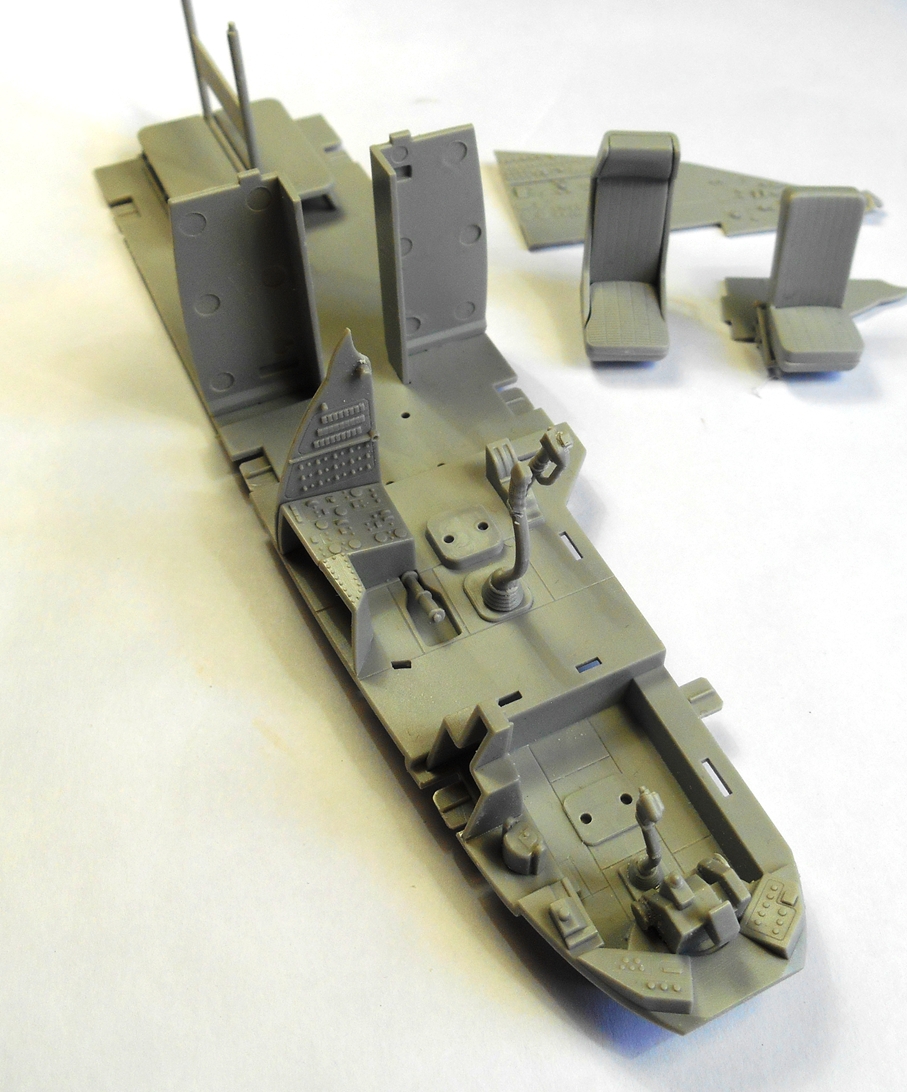
Un lavoro a parte richiede la
cabina, certamente è la parte che porta via più tempo e conviene “ affrontarla ”
poco alla volta.
Una volta allestita e
dipinta la cabina il resto del montaggio
diviene veloce.
Anche le eliche risultano enormi
con il loro diametro di 50 cm .
In generale bisogna affrontare un
lavoro di pittura su 4 sottoinsiemi, cabina, elicottero, eliche.
Per migliorare il dettaglio delle
panche all’interno dell’elicottero le ho rivestite con del teflon.
PITTURA
Come già detto si parte con la
cabina, tutta la parte dei comandi viene dipinta per separato base ad aerografo
con colori Vallejo Air un nero di base e a seguire un azzurro con velature
color verde.
Si passa poi ai vari tasti in
color nero per lo più, con gli oli (azzurro W&N e verde vescica Maimeri)
riprendo i pannelli e con un dry brush carnicino evidenzio i tasti, e gli
spigoli; la base e i sedili sono tutti dipinti in nero.
A questo punto bisogna allestire
i piloti, in commercio praticamente non ne esistono, ho tentato di recuperare
quelli della Cmk ma senza successo.
Ho risolto il problema
utilizzando il kit dei carristi coreani della Academy scatola 13251, le cui
dimensioni e posture si adattavano facilmente alla bisogna, con una lieve
modifica ai caschi e alcune braccia avanzate da kit Tamiya ho ricreato i piloti
russi del periodo afgano, con tute sabbia.
Per dipingere i piloti ho dato
colori ad aerografo e finiture a pennello, tutto con acrilici Vellejo air
seguito da un leggero lavaggio con ombra naturale W&N per variare la
tonalità generale del sabbia.
Una volta montato l’elicottero ho
dipinto la parte superiore ho utilizzato un sabbia e un marrone chiaro Vallejo
air e un bianco Italeri, mentre per quella inferiore un azzurro e un grigio
azzurro Vallejo air.
Per la parte mimetica ho
utilizzato un verde scuro Tamiya ripreso poi con un verde chiaro Vallejo air.
A seguire lavaggi generali con
oli( terra di kassel, siena tostato e ombra naturale W&N) e china Pelikan.
A circa 48 ore dai lavaggi ho ripreso i pannelli della parte superiore
con giallo e ocra gialla W&N e la
mimetica cin verde vescica Maimeri.
La parte inferiore ha subito lo
stesso processo ai pannelli ma con azzurro e carnicino W&N.
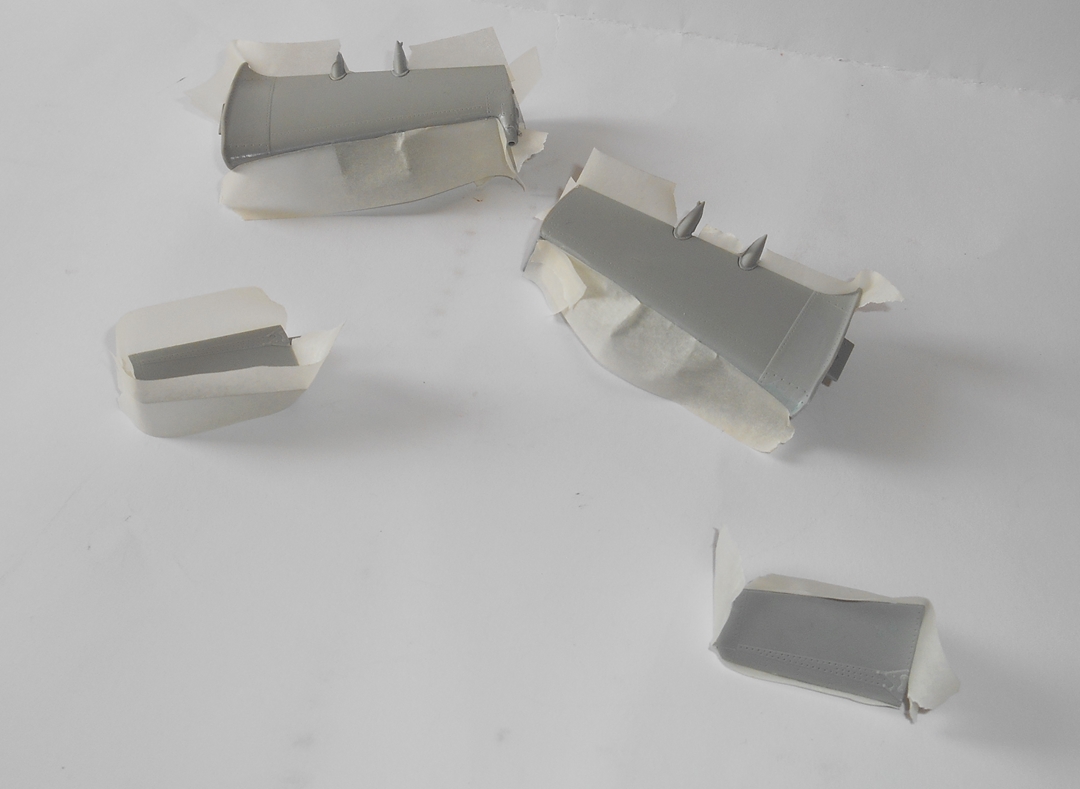
Per le eliche ho dato una base
nera e poi per la piccola lo stesso mix di colori della parte inferiore
dell’elicottero e per la grande nella parte superiore un verde Vallejo air,
entrambe le eliche sono state mascherate con nastro di carta per poi ricavare
la striscia color bianco.
L’elica piccola è stata trattata
con ombra naturale W&N e poi schiarita con carnicino della stessa gamma.
Per l’elica più grande stesso
trattamento con ombra naturale ma luci date con ocra gialla sempre W&N.
BASE
E AMBIENTAZIONE
Questa è una delle parti che
preferisco, in questo caso sono partito da un avanzo di mensola da armadietto
sulla quale ho incollato un rettangolo di polistirene il tutto 41,5 cm x 26,5 cm .
L’idea era ricreare una delle
brulle zone montagnose tipiche del territorio afgano.
Per creare la parte rocciosa ho
incollato vari scarti di polistirolo, polistirene e spugna per piante.
Dopo aver sagomato il tutto l’ho
rivestito con garza e colla vinilica.
La parte pianeggiante è stata
ottenuta utilizzando terracotta Plus posizionata in piccole porzioni di almeno 4 mm di spessore di modo da
evitare i ritiri durante l’essiccazione.
Ho poi inserito pietre di varie
dimensioni e sabbia (proveniente dalla spiaggia di Rimini) il pietrisco più
fine vie invece dalla Sardegna.
Mescolando un gesso acrilico e
tanta colla vinilica(tirando crea delle fratture che poi bisogna riprendere) ho
ricoperto il polistirolo e la garza dando così vita alla roccia .
Ad un lato di questa ho fissato
un perno che serviva per l’effetto di “volo” che desideravo dare
all’elicottero, certamente una forzatura inevitabile per ottenere un effetto
gradevole nell’insieme.
Sempre con i Vallejo air ho
dipinto la base, prima con un pietra medio, poi un flat tan, le luci con un
sabbia, lavaggio ombra naturale W&N e per finire nella parte “pianeggiante”
dei pigmenti Mig Middle East Dust.
I
FIGURINI
L’idea era ricreare una scena in
action, per questo ho allestito 8 figurini dei quali ho poi utilizzato solo 4
partendo dal bruttissimo kit Dragon Soviet Spetsnaz 3002 modificando i figurini nelle posture e
aggiungendo teste Hornet, uno dei figurini atti al salto è uno Svezda kit 3619 Soviet paratroopers un kit realmente
valido e ben fatto lo consiglio.
Per lo Spetsnaz in corsa ho usato
la parte inferiore di un Tamiya kit Russian assault infantry.
Per dipingerli ho dato un color
nero di base e a seguire tutta l’altra gamma di colori tutto ad aerografo.
La finitura è stata data a
pennello sempre con acrilici Vallejo air e solo per i visi ho utilizzato degli
oli W&N ma in quantita minima(giusto per le luci finali).
KIT
Trumpeter 05103 kit is easy to assemble, the biggest flaws are essentially three:
1) Big signs of injector, fortunately sites mostly in places not visible.
2) The canopy with a huge burr plastic and non-precise positioning
3) The considerable size and shape that make it difficult for any operation, especially painting.
A separate work requires the cabin, certainly is the part that takes the most time and should "deal with" little by little.
Once you set up and painted the cabin the rest of the assembly becomes easy.
Even the propellers are enormous with their diameter of 50 cm.
In general we have to deal with a paint job on 4 subsets, cabin helicopter propellers.
To improve accuracy of the benches inside the helicopter I coated with Teflon.
PAINTING
As I mentioned we start with the cabin, all of the commands is painted to separate basic airbrush colors Vallejo Air a black base and follow with a blue-green glazes.
It then moves on to keys in black mostly with oils (blue W & N and green bladder Maimeri) I did the panels and with a dry brush flesh I highlight the key, and the edges; the base and the seats are all painted in black.
At this point you have set up the pilots, on the market practically did not exist, I tried to recover those of Cmk but without success.
I solved the problem by using the kit of the tank drivers Korean Academy Box 13251, whose size and postures are easily adapted to the task, with a slight change to helmets and some advanced arms from Tamiya kit I recreated the Russian pilots of the Afghan period, with suits sand.
To paint the drivers have given color to airbrush and brush finishes, all with acrylic Vellejo air followed by washing with a raw umber W & N to change the overall tone of the sand.
After mounting the helicopter I painted the top I used a sand and a light brown Vallejo air and a white Italeri, while the lower blue and a gray blue Vallejo air.
For the camouflage I used a dark green Tamiya then treated with a light green Vallejo air.
Following general washes with oil (ground KASSEL, Burn Siena and raw umber W & N) and Pelikan ink.
After about 48 hours of washing I started using brushes to the top with yellow and yellow ocher W & N and the bladder green camouflage with Maimeri oil color.
The lower part has undergone the same process to the up panels but with blue and flesh tone W & N.
For propellers I gave a black base and then to the small the same mix of colors of the lower part of the helicopter and for the great in the upper part a green Vallejo air, both propellers were masked with paper tape to then derive the strip color white.
The small propeller was treated with raw umber W & N and then fill with flesh tone of the same range.
For the largest propeller i did same treatment with raw umber but give lights with yellow ocher always W & N.
BASE AND GROUND
This is one of my favorite parts, in this case I started from a surplus of shelf locker on which I glued a rectangle of polystyrene of 41.5 cm x 26.5 cm.
The idea was to recreate one of the barren mountainous areas typical of Afghan territory.
To create the rocky part I pasted various scraps of polystyrene and foam plants.
After shaping the whole I covered with gauze and glue.
The flat part was obtained using earthenware Plus positioned in small portions at least 4 mm thickness so as to avoid the shrinkage during drying.
I then inserted various size stones and sand (from the beach in Rimini) the finer gravel roads instead from Sardinia.
Mixing an acrylic chalk and lots of glue (drying up due to the fractures that then you have to close) I covered the foam and gauze thus giving rise to the rock.
To one side of this I fixed a pin which was used to the effect of "flight" I wanted to give the helicopter, certainly an exaggeration unavoidable to obtain a general pleasing effect .
Always with the air Vallejo I painted the base, first with a stone, then a flat tan, for lights use a sand and raw umber W & N and to finish in the "flat" part i use pigments Mig Middle East Dust.
THE FIGURES
The idea was to create a scene in action, so I set up 8 figurines of which I then used only 4 starting from the ugly kit Dragon Soviet Spetsnaz 3002 by changing the figurines in postures and adding heads Hornet, one of the figurines acts to jump is one Svezda kit 3619 Soviet paratroopers kit really good and well done, I recommend it.
For run Spetsnaz I used the bottom of a Tamiya kit Russian infantry assault.
To paint them I gave a black base and follow all the other range of colors all airbrushed.
The finish was applied by brush again with acrylic Vallejo air and only for the faces I used oils W & N but in minimal amount (just to end the lights).